






back to : AC crimping machines and AC fittings
Crimping AC hoses step by step - a guide
The short manual presented here applies to the most popular model of AC crimping machine (CPS-140) This die selection guide can be used for all types of AC crimping machines. Both presses of this type as well as the entire range of fittings (AC hose crimping ends, AC hoses, AC sleeves) can be purchased in our online store.
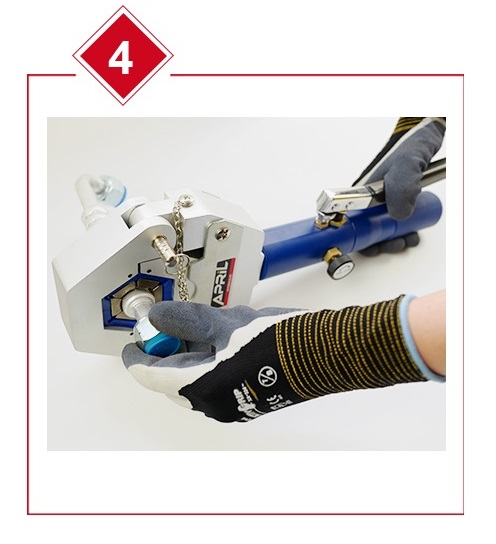
Step one - selection of the appropriate crimping dies.
Depending on the hose size ( 8,10,13,16 ) and its thickness ( thin-walled, thick-walled ) we choose the right color of the dies and install them in the manual crimper head. Choosing the die color is the most important part! If we choose the wrong color, we will not crimp the hose correctly! Which die colors for which hoses ?
Thick-walled AC hoses
#6 ( thick-walled hose DN08mm -5/16” ) - Purple
#8 ( thick-walled hose DN10mm - 13/32” ) - Red
#10 ( thick-walled hose DN13mm - 1/2” ) - Yellow
#12 ( thick-walled hose DN16mm - 5/8” ) - Green
Thin-walled AC hoses
#6 ( thin-walled hose DN08mm - 5/16” ) - Black
#8 ( thin-walled hose DN10mm - 13/32” ) - Purple
#10 ( thin-walled hose DN13mm - 1/2” ) - Orange
#12 ( thin-walled hose DN16mm - 5/8” ) - Blue
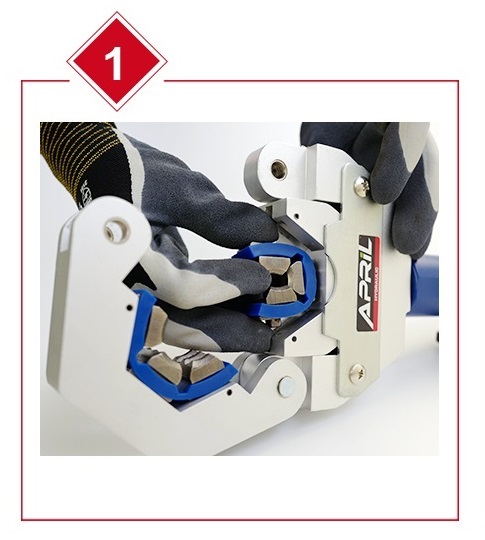
Step 2 - securing the head.
After installing the dies in the head, we close the head using a special hardened pin. Closing it will prevent the head from opening during crimping. The pin ensures that the lower die can reach the upper die. The head is secured after the hose with the sleeve and fitting has been mounted inside. !
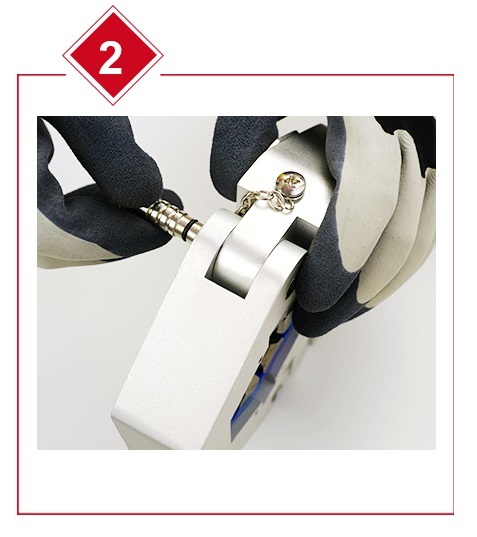
Step 3 - closing the valve
After mounting the dies and securing the head, it is time to close the valve. Closing the valve will allow us to pump the pump and press the head.
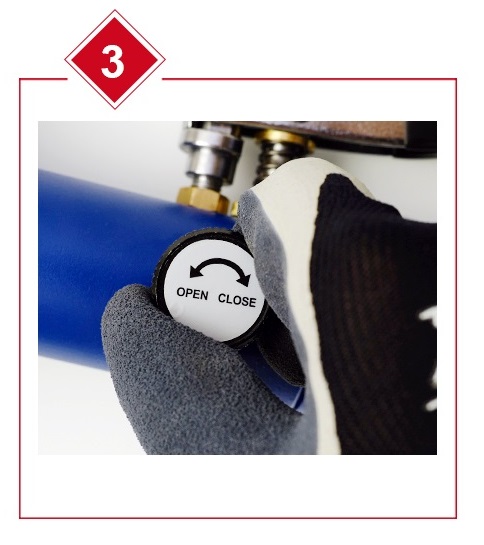
Step 3 - crimping the hoses
We crimp the hose until the lower part of the head reaches the end (reaches and touches the upper part). After crimping, we rotate the hose by 90 degrees and crimp the hose again. For correctness and 100% certainty, we can repeat the operation. NOTE : only crimping 2 or more times ensures a reliable connection.