










back to : FAQ - crimping machine troubleshooting or crimper micrometers
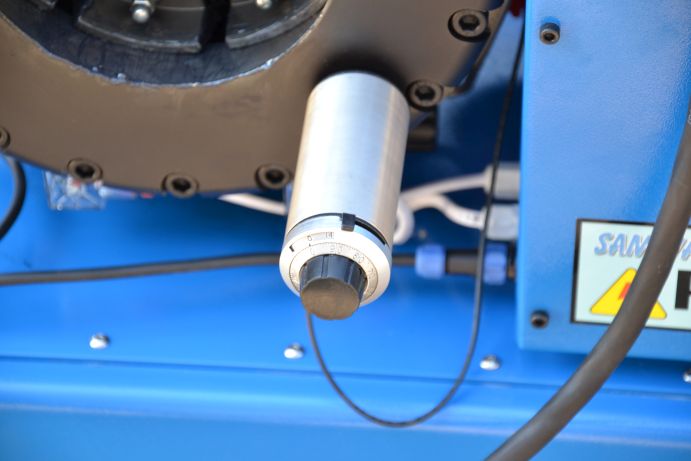
Micrometer calibration in the P32Q electric crimping machine
In the case of calibration in a crimping machine with a P32Q analog micrometer we can calibrate the micrometer ourselves. After inserting the dies e.g. number 19 and setting the value 1.60 on the micrometer, we first crimp a DN 10 2SN hose. Then we measure the crimped ferrule using a caliper. If the value indicates e.g. 21.4, it means the crimping machine is not crimping enough. We must then calibrate the micrometer. The crimp should be within 20.6 or 20.7. Therefore, the micrometer knob handle should be unscrewed using a very small Allen key. We take care not to lose this small screw locking our knob. Next, we very gently remove the knob and set it aside. A small pin will be revealed, by which we have the possibility of calibrating the micrometer through rotations to the left or right. Thus, with dies number 19 inserted and the micrometer knob set to 1.60. Once the dies are crimped until the indicator light on the switch turns on, we proceed to unscrew the micrometer handle knob. We unscrew the small screw locking our handle. Then, by gently turning the small pin to the left, we cause the indicator light to go out, thus the dies will crimp more tightly. We reassemble the micrometer knob handle by gently placing it back in its place and tighten the locking screw. After removing the micrometer knob, a delicate plate with two protruding pins will be revealed inside (these are very small, delicate elements). Therefore, we pay attention so that the protruding plates from the micrometer are evenly seated in the same holes of the handle. We crimp again, performing another measurement of the crimped ferrule. If we have not obtained the desired crimping parameter, we repeat this action until we obtain the correct crimp.
P32D MICROMETER CALIBRATION ( DIGITAL CRIMPING MACHINE )
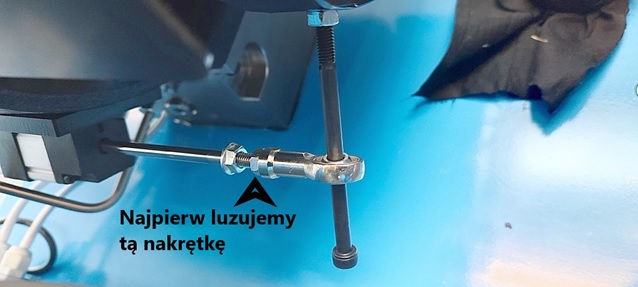
In the case of a crimping machine with digital control, we also have the option to calibrate the micrometer (model P32D). Calibration also takes place by inserting dies, e.g. number 19, and setting parameter 1.60 on the digital display using the SHIFT button. As a reminder, all digits after setting must be steady and cannot blink. Of course, DN10 2SN hose – crimp to 20.6 mm. In this case, we also crimp the hose and measure the crimped ferrule using a caliper. If we have a value other than 20.6 or 20.7, we proceed to calibrate the micrometer. Behind the crimping head at the bottom of the head, we have an Allen bolt screwed into the head – it is locked with a nut for a 10 mm wrench. First, we loosen the nut on the union where we have two nuts – loosen it gently. Next, we loosen the nut on the Allen bolt screwed into the head and completely unscrew the long black Allen bolt. Rotations to the left or right after completely unscrewing the black Allen bolt allow us to calibrate the micrometer. We first loosened the locking screw on the long silver union to have room to tighten or unscrew the screw regulating the closing or opening of the main dies. We calibrate the micrometer by turning the entire union with the black Allen bolt to the right or left. To start, for example, two or three turns tightening or loosening the entire set will be enough. Depending on whether it is over-crimping or under-crimping. We lock all the screws back and crimp again checking the crimp diameter. We repeat this action until the desired crimping parameter is obtained.
MICROMETER CALIBRATION INSTRUCTIONAL VIDEO
Read also : how to use a micrometer without damaging it